ElasticSuite - Create New Customer:
About:
This guide shows you how to create a new front-end user in Elastic using the Admin portal, as well as options for self-registration where applicable.
✔ Make sure the account number exists in the customer data before adding a user.
✔ If the user doesn’t receive an email, check spam filters or verify the entered email address.
✔ Only users with proper access rights and status can log in successfully.
Required:
1, An Admin account.
2, An M3 Account for the user.
What is ElasticSuite?
ElasticSuite is a business application used by organisations to manage product information, orders, and customer accounts. It helps sales teams, buyers, and account managers access catalogues, check stock availability, and process orders efficiently.
- ElasticSuite is not a Microsoft product, but it may integrate with Microsoft services for login or notifications.
- It is commonly used for customer account management, order processing, and viewing product catalogues.
- Users can have different access levels, such as full-ordering, view-only, or account management privileges.
Sign in to the Admin Portal:
1, Go to your Elastic Admin login page (this is different from the regular user login page).
2, Log in with your Admin account credentials.
Locate the Users Section:
1, From the Admin dashboard, navigate to: Admin → Users
2, This opens the list of all existing users (rep/dealer/test/disabled).
Start Creating the New User:
1, On the Users page, click New User (typically in the top right).
2, A new user form opens.
Enter the User Details:
1, Fill in the required fields marked with *:
- First Name
- Last Name
- Username
- Email Address
- Account Number (must exist in the customer data (Like M3) first)
2, Optional:
- Associated Customers (attach other customer accounts if needed)
- Account Manager (check this if this user should have extra privileges)
- Email Confirmation Settings
- Enable/Disable user status
Password Setup Options:
1, You have two options:
✅ Require the user to choose their own password before first login
- Best for self-setup — user receives a link to complete registration.
❌ Admin sets a temporary password
- You enter the initial password manually and communicate it separately.
Create the User:
1, When all mandatory fields are complete, click Create User. If any fields are missing or incorrect, you’ll receive an error message explaining what needs fix-up.
2, After creation:
- A registration/confirmation email is sent to the user’s email address if the “require password choice” option was selected. Otherwise, they get a notification that their user account is created
Optional: User Self-Registration (Brand Config Dependent):
Some brands allow users to register themselves:
1, On the Elastic login page, users click Register.
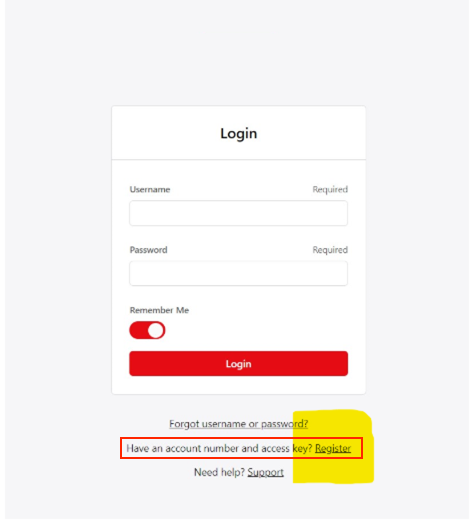
2, They enter their account number and access key (provided by the brand).
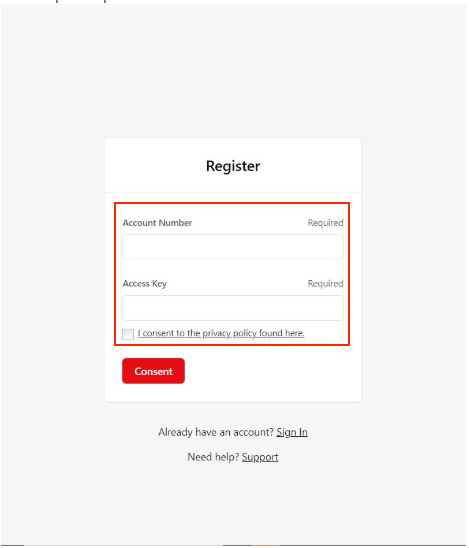
3, A registration form appears to set username/password and complete their profile.
Confirm and Test the New User:
1, Ask the new user to log in using the credentials or registration link they received. Verify they can access the Elastic dashboard and relevant catalogs.
Multiple users on a customer account:
Some customer accounts need more than one user. For example, different buyers may order different products, or some users may only need to view stock and prices without placing orders.
Decide who the Account Manager is:
Each customer account must have one Account Manager.
- This is a user linked to the customer account
- They are responsible for managing other users on that account
- The Account Manager does not have to be a employee at the same company
Set the Account Manager flag:
This step must be completed by a Same Company admin user.
- Find the selected user in the Elastic admin portal
- Edit the user
- Change the Account Manager setting to Yes
- Save the changes
Access User Manager in Elastic:
Once the user is marked as an Account Manager:
- The user logs in to Elastic
- Go to Start Working → User Manager
This option is only visible to users marked as Account Managers.
Manage users on the account:
From User Manager, the Account Manager can:
- View all users linked to the account
- Disable users who no longer need access
- Keep the user list up to date
This helps ensure only valid users can access the account.
User registration requirement:
All additional users must still register normally:
- Go to the Elastic login screen
- Select Register
- Enter the required account details
- Complete registration
Once registered, they will appear in the User Manager for the Account Manager to manage.
View-only users (non-ordering):
Elastic can be set up so some users can view information only and cannot place orders. This is useful for users who only need to check catalogues or stock availability.
To set up a view-only user:
- Locate the user in the Elastic admin portal
- Edit the user’s settings
- Find “Disable Order Creation and Submission”
- Change this setting to Yes
- Save the changes
Once enabled, the user can:
- View catalogues
- Check product availability
They will not be able to create or submit orders.
And you are done 😄